
If your attic smells musty after a deep freeze or you’ve noticed dark staining on the roof sheathing, you’re not alone. Minneapolis winters are tough on roofs, and one of the most common side effects is attic mold driven by ice dams and poor ventilation. Homeowners often see spotless living areas, while hidden moisture in the attic fuels growth overhead. This guide explains how ice dams form, why they lead to mold, when to order testing, and how a clear plan keeps your home healthy year-round.
How ice dams lead to attic mold
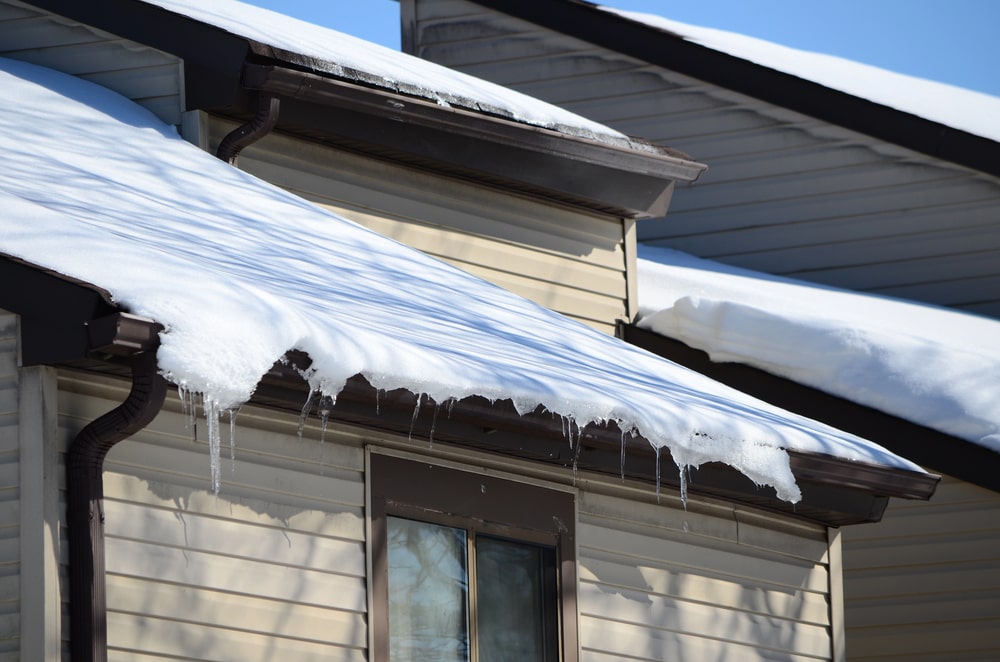
Ice dams build up when warm air from the house leaks into the attic, heating the roof deck from below. Snow melts, water runs toward the eaves, and then refreezes at the colder edges, forming a dam. Liquid water backs up under shingles and wets the roof sheathing and insulation. Even small amounts of moisture can spike humidity in the attic, creating ideal conditions for mold. Over time, you may see discoloration on plywood, rusty nails, or an earthy odor. Because this often happens above finished ceilings, the problem can advance for months before anyone notices.
The Minneapolis climate effect
Our freeze-thaw cycles, heavy snow loads, and long heating seasons make moisture control a year-round job. In extreme cold snaps, humid indoor air condenses on cold attic surfaces—especially around bath fan ducts, can lights, and unsealed attic hatches. That’s why attic mold testing Minneapolis homeowners request most frequently happens mid-winter, after roof leaks, or in early spring when temperatures swing.
When to schedule testing (even if you don’t see mold)
Visual clues are helpful, but testing tells the full story. Consider scheduling Mold Testing and Minneapolis, MN if you notice:
- Persistent musty odor from ceiling cavities or upper floor hallways
- Dark staining on roof sheathing, trusses, or around penetrations
- Past ice dams or icicles hanging from eaves and gutters
- Water marks on ceilings after snowstorms
- Bath fans venting into the attic or ducts disconnected at the roof cap
- High indoor humidity, condensation on winter windows, or peeling paint at the top corners of rooms
Testing is also smart before finishing an attic, following roof replacement, or after insulation upgrades. It confirms you’re starting with a clean, dry space.
What targeted attic testing includes
A professional will combine several tools to understand both moisture and air quality:
- Visual and moisture assessment: Inspect sheathing, insulation, and framing; measure wood moisture content and scan for cold spots.
- Air sampling (attic vs. living space): Compares airborne spore levels to see whether attic issues are affecting indoor air.
- Surface sampling: Swabs discolored areas to identify species and assess activity vs. staining from past events.
- Thermal imaging: Finds heat loss paths and hidden wet zones behind the roof deck or around chimneys and skylights.
- Ventilation review: Checks soffit intake, ridge or roof vents, and bath/kitchen exhausts to verify proper airflow out of the home.
This targeted approach distinguishes an active problem from historic staining and guides precise remediation if needed.
Interpreting results without the guesswork
A clear report should identify species present, relative concentrations, and the conditions enabling growth. Elevated attic-only readings don’t always mean your living area is affected—but they do indicate a moisture control issue. With Mold Testing and Minneapolis, MN, the value isn’t just the lab data; it’s also the recommendations tied to your roof system, ventilation, and insulation. A good report will outline the next steps, from spot treatment and HEPA vacuuming to baffle installation and air sealing.
Fix the source: air seal, ventilate, and insulate
Remediation without source control is only a temporary fix. Practical steps that work in Minneapolis homes:
- Air sealing: Foam and caulk around top plates, can lights rated for insulation contact, plumbing stacks, and the attic hatch.
- Ventilation balance: Ensure continuous soffit intake and a clear ridge vent (or adequate roof vents); unblock soffits with proper baffles.
- Ducting to exterior: Bath and kitchen fans must terminate at a roof or wall cap, not in the attic.
- Right-sized insulation: Insulate to recommended R-values; avoid crushing fiberglass at eaves so intake air can flow freely.
- Humidity control: Keep indoor RH under ~40% in deep winter to minimize condensation.
These improvements lower the risk of future ice dams and keep the attic dry.
Remediation: what “good” looks like
If testing indicates elevated growth, a qualified team should isolate the work area, create negative pressure, and use HEPA filtration during cleaning. Techniques may include gentle mechanical removal of surface growth, HEPA vacuuming, and application of antimicrobial solutions approved for structural materials. In more advanced cases, selective material replacement may be recommended. A clearance test after work verifies that the attic environment is back to normal levels.
Planning ahead: timing and seasons
You don’t have to wait for spring. Testing and remediation can occur in winter, although roof-side repairs (baffles, vents, shingle work) may depend on weather. Many homeowners pair indoor source control now with exterior upgrades once temperatures rise. The critical step is documenting conditions so you can prioritize the right fixes in the right order.
Internal resource to explore next
Want to understand the dollars and cents before you start? Read our guide: DIY vs Professional Mold Testing in Minneapolis, MN.
Book a targeted attic assessment
Keep Ice Dams from Becoming a Summer Headache
Get ahead of the season with a focused attic inspection and testing. Schedule a professional Mold Testing Minneapolis, MN service with PureOne Services. We’ll pinpoint moisture pathways, confirm what’s active, and give you a step-by-step plan to keep your attic clean and dry.